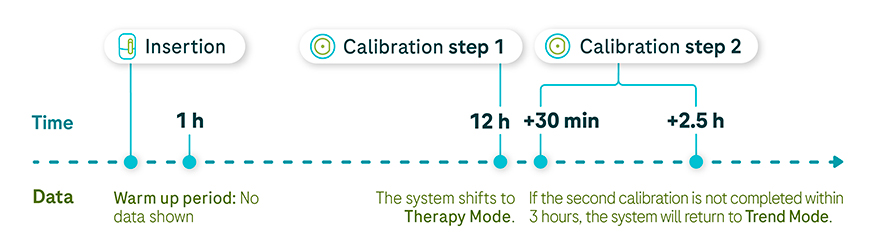
The sensor requires calibration to provide you with the most accurate readings possible:
- An uncalibrated sensor will be in Trend Mode. You can see CGM values but should not use them for therapy decisions.
- A calibrated sensor will be in Therapy Mode. You can use the confirmed values to make therapy decisions (e.g., to dose insulin).
The calibration routine consists of two steps:
- The first calibration request will show up 12 hours after the insertion of the sensor.
- A second request will appear 30 minutes to 3 hours after the initial calibration.
Image
Here’s how to calibrate the sensor
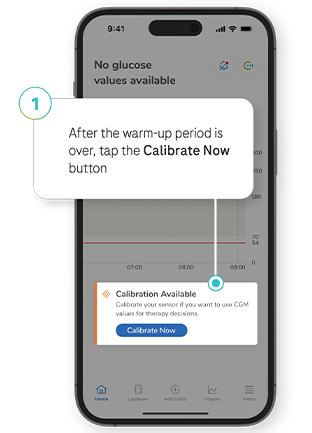
Step 1
The app will prompt you to calibrate 12 hours after applying the sensor. Tap the Calibrate Now button.
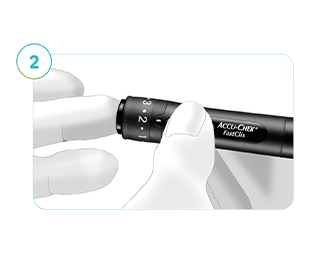
Step 2
Take a glucose reading with your glucose meter. When you enter it into the Calibrate screen, the reading must be within the 2.3 mmol/L and 22.1 mmol/L range and not older than 3 minutes.
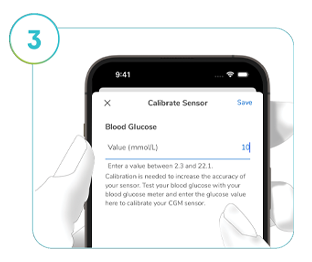
Step 3
Enter your blood glucose reading and tap Save. Make sure the value is correct because you cannot change it later. Tap Confirm to proceed, or Cancel to return to the previous step.
If you confirm an incorrect value, system performance cannot be guaranteed. Discard the sensor, apply a new one, and repeat the previous steps.
Step 4
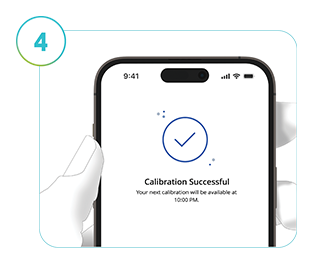
If calibration is successful, a confirmation message will appear. Tap OK to return to the Home screen. If calibration is unsuccessful, wait at least 15 minutes before repeating the process using a new reading from your blood glucose meter.
Step 5
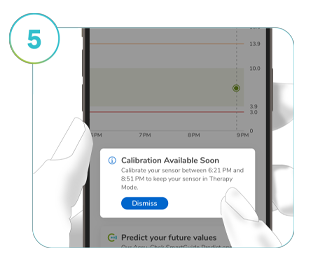
Calibrate the sensor whenever the app prompts you to do so.
You should enter the second calibration value 30 minutes after completing the first calibration test. Tap Calibrate and repeat steps 2 to 4. After these steps, your system will be in Therapy mode until the end of the sensor session.
When prompted to calibrate the sensor, prepare for a test at your earliest convenience.
How helpful did you find this training?
Continue Training
Previous step
Accu-Chek Newsletter
Stay informed about diabetes
Get diabetes management tips and news delivered right to your inbox.
Get in touch
Give us a call
Mon-Fri from 9:00 am to 5:30 pm
Hotline: 2485 7512